
Inside – Avoid weaving in your blankets by hiding them in a Moss Stitch Envelope Border.
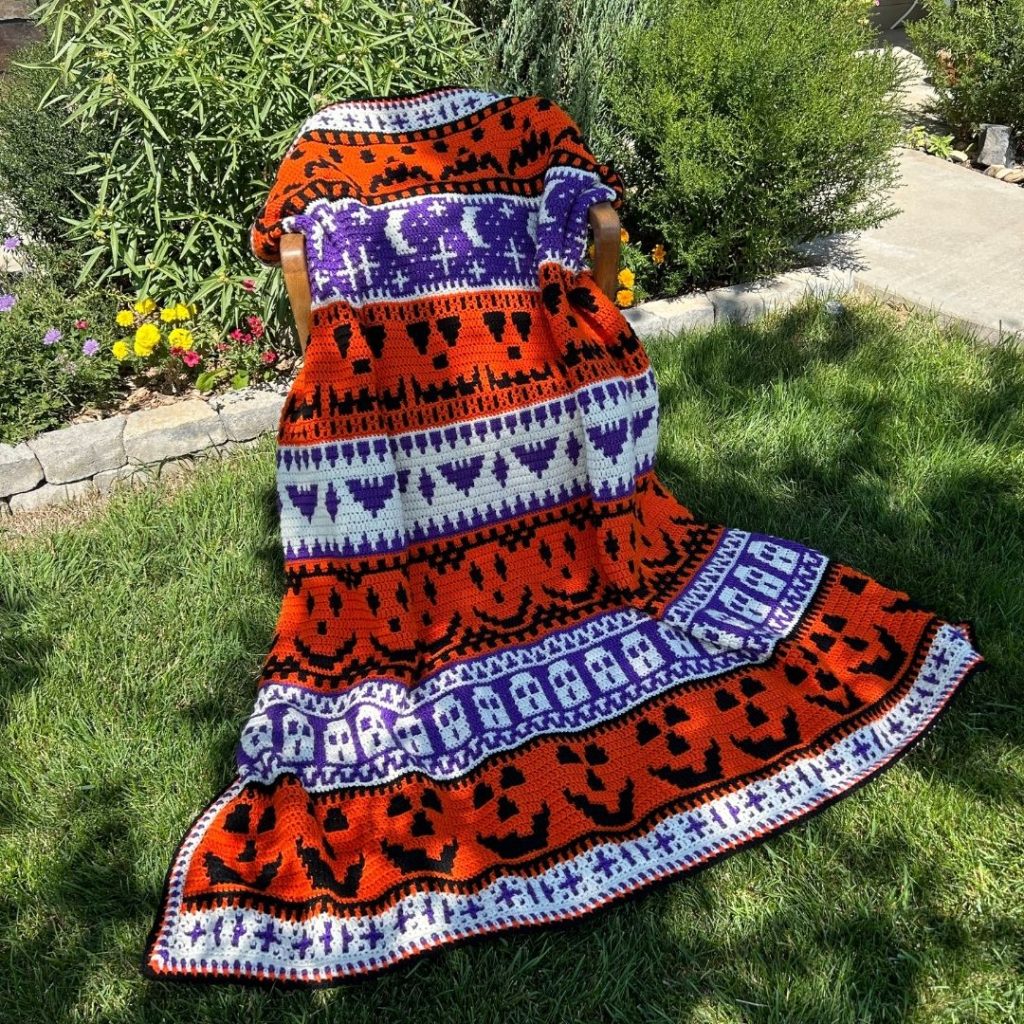
Are you done crocheting your Spooky Season Mosaic Crochet Blanket? Congratulations! The only part left is what to do with all those ends. Eek! Thinking about weaving them in might give you a fright. However, there is a wonderful crochet hack that hides those ends, and gives you a beautiful border.

Spooky Season Mosaic Blanket CAL (crochet along)
In case you missed it… we’re crocheting this blanket together! The Spooky Season Mosaic Blanket is an overlay mosaic crochet pattern. What is overlay mosaic? It is a crochet technique that works on the Right Side of the fabric, and uses alternating Front Loop / Back Loop stitches to create an image. All you need to know is how to Single Crochet and Double Crochet before starting this crochet pattern.
✨ Need help with overlay mosaic crochet? ✨
Check out this video tutorial here.
Spooky Season CAL Details
- Start Date – Thursday, August 28th
- End Date – Thursday, October 16th (plenty of time to finish before 10/31)
- Duration – 8 Weeks (7 crochet sections + border)
- Where – High Desert Yarn Community Group on Facebook (click here to join the fun!)
- Cost – Free Pattern on the Blog (released weekly on Thursdays) or $12.99 PDF pattern (shop on Etsy or Ravelry)
What is a Moss Stitch Envelope Border?
First, an envelope border is made by crocheting 4-5 border rounds on the front and back of a blanket. So, you have two pieces of crocheted fabric to seam together in a final round. As you stitch the final round, the ends from the overlay mosaic blanket are tucked inside the pocket.
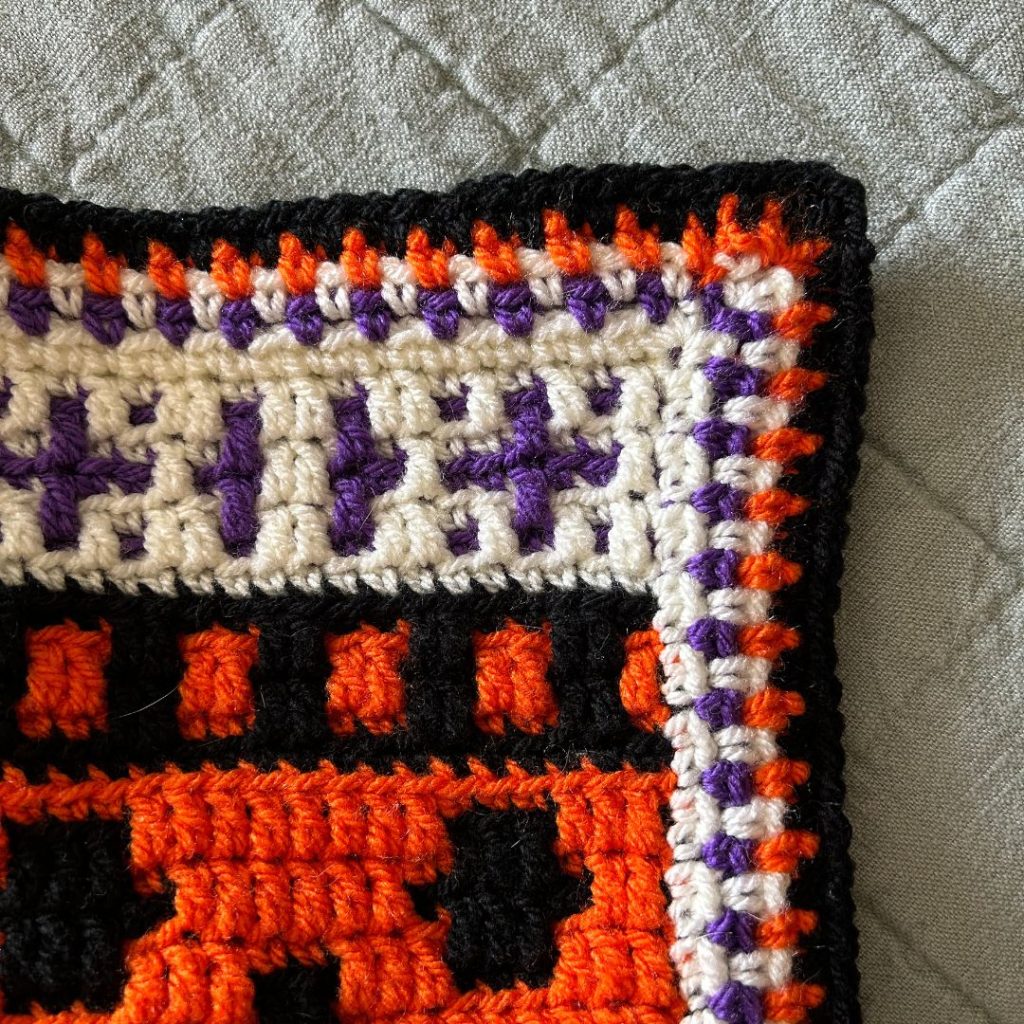
There are many different stitch variations you can use for an envelope border. For the Spooky Season Mosaic Blanket, I chose the Moss Stitch. Not only is it one of my favorite stitches, but it’s easy to highlight all four colors used in the blanket.
Why you’ll love the Moss Stitch Envelope Border
- Quick working to finish your blanket
- Looks great with alternating colors
- Beginner friendly + avoids crocheting over the ends
NOTE ABOUT THIS FREE CROCHET PATTERN :
Thank you for choosing this free pattern as part of your crochet journey! It’s an honor for you to be here, browsing the High Desert Yarn Blog. This pattern is 100% free for you to crochet from, but please, do not screenshot, or copy+paste this pattern. However, work directly from this webpage. The ad revenue from this website allows me to offer free crochet patterns. If you do not like the scrolling, or ads, then you may purchase the ad-free PDF in my Etsy Shop or Ravelry Store. Thank you for your cooperation. Happy creating! -Joanna (Owner + Creative)
Stitch Abbreviations
US crochet terms used throughout.
- CH(s) – chain(s)
- SC – single crochet
- SL ST – slip stitch
- st(s) – stitch(es)
- rep – repeat
- Color A – Orange
- Color B – Black
- Color C – White
- Color D – Purple
Written Instructions for the Moss Stitch Envelope Border
An envelope border creates a “pocket” to hide all the yarn ends instead of weaving them into the blanket. You will crochet a front and back panel. Then, seam it together with single crochet stitches. Each panel consists of four rounds before the fifth round to join the panels.
This specific envelope border uses the Moss Stitch. Do not crochet tight! You may need to size up one hook size to prevent tight stitching. Alternatively, you can substitute the Moss Stitch with the Single Crochet Stitch.
Preparing the Blanket
Once you’re finished with the blanket, you need to prep the ends before creating the envelope border. Securely tie two ends together, and trim the ends down to 1-2″ long.
Front Panel
Place the blanket right side facing you, and start in the top right corner of the blanket. Attach the Color C yarn with a SL ST.
*Feel free to change the color sequence.*
Round 1: sc in the front loop of each ST until you reach the corner. In the corner, sc, ch 1, sc. Along the side of the blanket, sc in the bottom loop of each side stitch (see photo below). In the corner, sc, ch 1, sc. Along the bottom of the blanket, sc in the front loop of each ch. In the corner, sc, ch 1, sc. Along the side of the blanket, sc in the bottom loop of each side stitch (see photo below). In the corner, sc, ch 1, sc. Attach Color D.
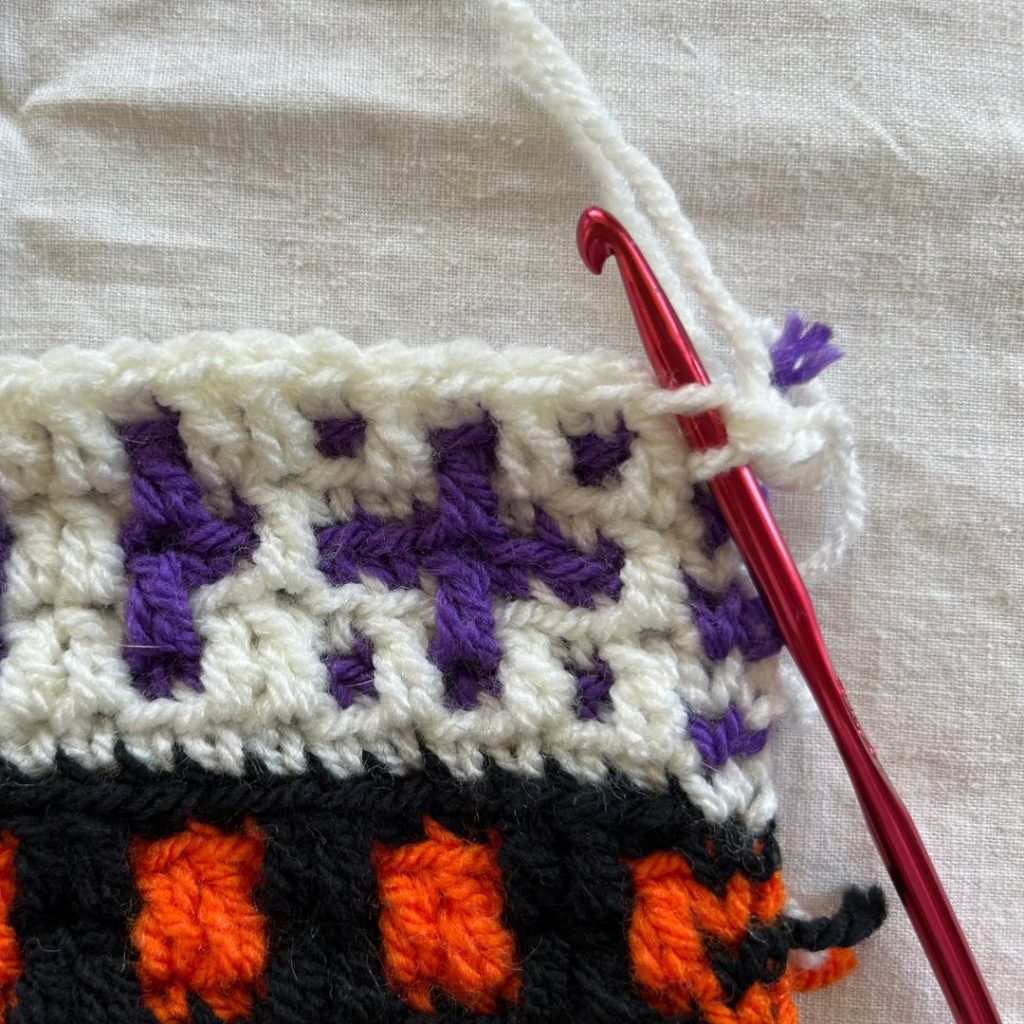

Round 2: With Color D, sc in 1st st, * ch 1, sk st, SC in next st, rep from * until next corner (sc, ch 1, sc) **, rep from * to ** all the way around the blanket, attach Color C.
Round 3: With Color C, sc in 1st st, * ch 1, sk st, SC in next st, rep from * until next corner (sc, ch 1, sc) **, rep from * to ** all the way around the blanket, attach Color A.
Round 4: With Color A, sc in 1st st, * ch 1, sk st, SC in next st, rep from * until next corner (sc, ch 1, sc) **, rep from * to ** all the way around the blanket, attach Color B.
Back Panel
Repeat Rounds 1-4 of the Front Panel
Seaming the Panels Together
Round 5: With Color B, sc through both sts of the front and back panels. At each corner, (sc, ch 1, sc) in the ch-1 space. Fasten off and weave in any remaining ends.
Done with the Moss Stitch Envelope Border?
Share what you’ve crocheted in the HDY Handmade Community on Facebook! We’d love to see what you’ve made, and cheer you on. 🧡 Click here to join our group.


